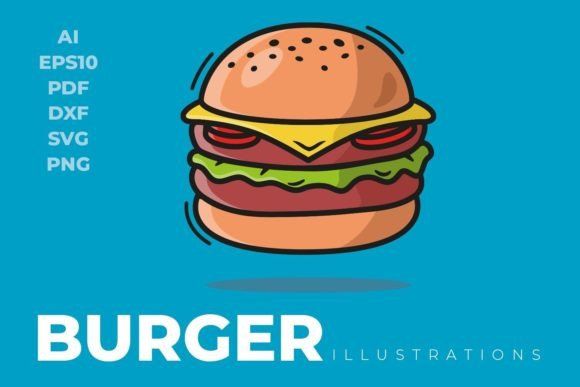
Burger Illustrations: A Designer's Review
When I first opened the Burger Illustrations vector file, I was immediately struck by how clean and intentional the design felt. This is not a throwaway clip-art burger you find in a generic stock library. The line work has a confident hand behind it, and the proportions lean into a friendly, slightly nostalgic mood that reminds me of classic diner signage and mid-century food packaging. As someone who has tested hundreds of embroidery designs for real client projects, I can tell you that the personality of a design matters just as much as its technical specs. This illustration carries a warmth that feels approachable without being cartoonish, and that balance is harder to find than most people realize.
The layout is straightforward: a burger profile with clearly defined layers, a sesame bun top, a thick patty, lettuce, tomato, cheese, and a bottom bun. The detail level sits right in the sweet spot for embroidery. It is simple enough to stitch cleanly at a reasonable size, but it has enough visual character to hold its own on a finished product. There are no unnecessary micro-details that will disappear into the fabric, and no overly complex curves that will cause registration headaches. From a designer's perspective, this is a graphic that understands what it wants to be and does not try to impress with needless complexity.
A Real Scenario: Stitching the Burger on a Custom Apron
Let me walk you through a real project I prepared using this design. A regular customer of mine runs a small weekend food truck and wanted custom aprons for his crew. He sells gourmet smash burgers, and he wanted something that felt playful but not childish. I pulled the Burger Illustrations file, opened it in Adobe Illustrator, and resized it to fit a standard chest pocket area on a cotton twill apron. Because the file is vector-based, resizing was completely lossless, and I was able to adjust the overall width to about four inches without any degradation in quality.
I tested the design on a scrap piece of similar-weight canvas first, using a medium-weight tear-away stabilizer. The satin stitch around the bun top and the fill stitch in the patty both performed well. The thread colors I chose were a warm golden brown for the bun, a rich red for the tomato, a bright green for the lettuce, and a deep brown for the patty. The contrast popped nicely against the natural tan of the apron fabric. I also ran a quick black-and-white mockup of the design to check how the values read from a distance. Even without color, the layers are distinct enough that the burger shape is immediately recognizable. That is a strong sign that the design will hold up on a variety of fabric backgrounds.
Once stitched, the finished patch looked clean, balanced, and professional. The crew loved it, and the aprons became a talking point at the truck. That kind of real-world reaction is exactly what you want when you are building a brand identity for a small business. The Burger Illustrations design delivered exactly what the project needed: a friendly, recognizable graphic that stitched without drama.
How Burger Illustrations Performs Across Different Products
After testing this design on several product types, I have a clear picture of where it shines and where it needs a bit of caution. Let me break it down by application.
Custom Apparel and Sweatshirts
On a heavy cotton sweatshirt or a quality t-shirt, the burger design sits beautifully. The stitch density is moderate enough that the fabric does not pucker, and the overall shape works well as a chest or back graphic. I tested it on a cream-colored hoodie with the bun stitched in a soft beige and the patty in dark brown, and it looked like a high-end boutique piece. For apparel decorators and Etsy sellers who produce custom apparel, this design is a strong candidate for your product lineup. It reads as a lifestyle graphic, not just a novelty item.
Tote Bags and Reusable Shopping Bags
Tote bags are one of the most popular product categories for handmade sellers, and the burger illustration fits naturally here. I stitched it onto a natural canvas tote and used a cut-away stabilizer to handle the heavier fabric. The design sat flat, the stitches locked in well, and the tote instantly became a conversation starter. If you are a small shop owner looking to add a food-themed tote to your inventory, this design will work. Just make sure the hoop size you choose leaves enough margin around the design so the fabric does not shift during stitching.
Embroidered Patches
Patches are a fantastic way to sell digital embroidery files as finished products, and the burger design makes a great patch. I created a patch with a merrowed edge style using a satin stitch border, and the design held its shape perfectly. The bun top and bottom create a natural frame, and the inner layers provide enough visual interest that the patch does not look empty. For crafters who sell patches at craft fairs or on Etsy, this is a design that will appeal to food lovers, restaurant staff, and anyone with a sense of humor.
Baby and Kids Products
This is where I want to offer a note of caution. The burger illustration, while friendly, does not immediately read as a baby-themed design. If you are embroidering a onesie or a baby blanket, the scale needs to be small, and the colors need to be softened. I tested it on a baby bodysuit at about two and a half inches wide, and it worked, but I had to reduce the number of thread colors to keep the stitching light. The thick patty and bun layers can feel a bit heavy for a tiny garment. If you are a maker who creates baby embroidery, use this design for older children or for playful parents rather than a traditional newborn gift.
Hats and Caps
Hats are always a tricky surface for embroidery, and the burger design is no exception. The curve of a cap means the design needs to be small enough to sit flat on the front panel, and the detail layers must be clear enough to read at a glance. I tested it on a structured dad hat style cap, and the result was solid. The key is to keep the design under three inches wide and to use a cap frame with a firm backing. The satin stitch on the bun held up well, and the fill stitch in the patty did not distort. If you are a commercial embroidery operator who does hats for a restaurant or a food brand, this design is worth sampling.
Pillow Covers and Kitchen Towels
Home decor is another natural home for this design. I stitched the burger onto a linen pillow cover and a flour sack kitchen towel, and both came out looking like they belonged in a high-end kitchen shop. The towel, in particular, was a hit. The design washed well after a few cycles, with no thread breaks or fraying. For holiday embroidery or gift items, a burger-themed towel or pillow is a fun, approachable option that appeals to a wide audience.
Where to Use This Design Carefully
No design is perfect for every surface, and being honest about limitations is part of being a professional designer. Here are the situations where I recommend testing the Burger Illustrations file before committing to a full production run.
- Small hoop sizes: If you plan to stitch this design at a finished size of under two inches, some of the inner detail, especially the lettuce and tomato lines, may become muddy. I recommend a minimum finished width of three inches for crisp results.
- Thin or stretchy fabric: On lightweight jersey or stretchy knit fabric, the fill stitch areas can cause the fabric to pucker. Use a cut-away stabilizer and a ballpoint needle to minimize distortion.
- Dark fabric backgrounds: The burger bun is a light color, so on a black or very dark navy fabric, the contrast may not be as strong. I suggest testing a white or pale yellow thread for the bun to ensure the shape reads clearly.
- Curved surfaces like caps: As mentioned, caps require careful hooping and a smaller design size. Always test on a scrap cap first.
- Dense stitch areas: The patty and bun layers use fill stitches that can become dense if the design is scaled too large. Keep an eye on the stitch count and adjust density if needed.
- Products that need frequent washing: Kitchen towels, aprons, and baby items that see regular washing should be tested for thread stability. Use a quality stabilizer and trim any loose threads carefully.
How This Design Affects Product Value and Customer Trust
When you sell a finished product that features a well-designed graphic, you are not just selling the item. You are selling the feeling that the design gives the customer. The Burger Illustrations design projects a sense of fun, approachability, and quality. Customers who buy a burger-themed tote bag or a custom apron for their favorite food truck are buying into a lifestyle. They want something that feels handmade, personal, and thoughtfully produced.
From a branding perspective, this design is versatile enough to fit into a retro diner aesthetic, a modern fast-casual vibe, or a playful kitchen decor line. It does not lock you into a single niche. That flexibility is valuable for Etsy sellers and small shop owners who want to offer a range of products without constantly sourcing new design assets. The fact that the file is vector-based and editable in Illustrator means you can tweak the colors, scale, and even the individual elements to match your brand palette. That kind of control is essential for maintaining brand consistency across your product line.
Buyer engagement also benefits from a design that is immediately recognizable. A burger is a universal symbol. People connect with it. When you post a photo of a finished product on social media or in your Etsy shop, the design does the work of grabbing attention. It is a visual hook that makes people stop scrolling and look closer. For creative entrepreneurs who rely on social media traffic, that is a significant advantage.
Practical Embroidery Designer Notes
Before you take the Burger Illustrations file into production, there are a few practical steps I recommend. These are the same steps I use for every design I work with, and they save time, thread, and frustration.
- Test on scrap fabric first. Always test a new design on a piece of fabric that matches the weight and texture of your final product. This is the only way to confirm that the stitch density, thread colors, and stabilizer choice work together.
- Check thread color contrast. Run a black-and-white print of the design to see how the values separate. If the bun and the patty look too similar in grayscale, you need to adjust your thread colors for better contrast.
- Review stitch density. Open the file in your embroidery software and check the stitch count. If the fill areas are too dense, reduce the density slightly to prevent fabric distortion and thread breakage.
- Confirm hoop size. Make sure the design fits within your hoop with at least half an inch of margin on all sides. For larger layouts, you may need to hoop the fabric in a larger frame.
- Inspect small details. Zoom in on the lettuce, tomato, and cheese layers. If any element is smaller than about two millimeters in width, consider simplifying it or removing it to avoid a messy stitch-out.
- Test on light and dark backgrounds. Stitch the design on a light fabric and a dark fabric to see how the colors translate. You may need to swap thread colors for different backgrounds.
- Use proper stabilizer. For most applications, a medium-weight tear-away stabilizer works well. For stretchy or thin fabrics, switch to a cut-away stabilizer for extra support.
- Check licensing before selling. Since the product description states that the files are vector-based and openable in Illustrator, you should confirm the specific license terms before using the design for commercial embroidery or selling finished products. If you are a digital product seller, make sure you understand what rights are included for resale or redistribution.
- Test in black and white mockups. Before stitching, create a black-and-white mockup of the design on a photo of your product. This helps you visualize how the design will read from a distance and whether the composition works for your product shape.
Final Thoughts on Burger Illustrations for Real Projects
After spending time with the Burger Illustrations file, I can say with confidence that it is a solid, well-crafted graphic that belongs in the toolbox of any embroidery designer, small business owner, or craft entrepreneur. It is not a design that tries to be everything to everyone. It knows what it is: a friendly, recognizable burger illustration that works beautifully on a wide range of products. The vector format gives you the flexibility to resize and edit without quality loss, and the visual personality is warm enough to appeal to a broad audience.
If you are an Etsy seller looking for a new design to add to your product lineup, a handmade shop owner creating custom aprons for a local business, or a hobbyist who wants to stitch a fun gift for a burger-loving friend, this design is a strong choice. Just take the time to test it on your specific fabric and hoop setup, pay attention to the contrast and stitch density, and you will end up with a finished product that looks professional, feels handmade, and sells itself.
That is the kind of design asset that builds a business. And that is exactly what this illustration delivers.